In this section of the workshop you will create a custom cluster blueprint with a Amazon CloudWatch Agent add-on, based on declarative specifications.
Step 1: Create Repository
In this step, you will create a repository in your project so that the controller can retrieve the Helm charts automatically.
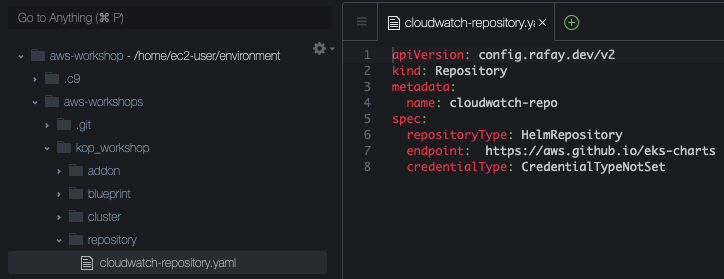
Go to Cloud9 and navigate to the folder where you forked the Git repository /aws-workshops/kop-workshop/repository and open cloudwatch-repository.yaml file. This file contains the declarative specification for the repository. In this case, the specification is of type Helm Repository and the endpoint is pointing to the AWS Github repository that includes the CloudWatch Helm chart.
Type the command below to create the repository
rctl create repository -f cloudwatch-repository.yaml
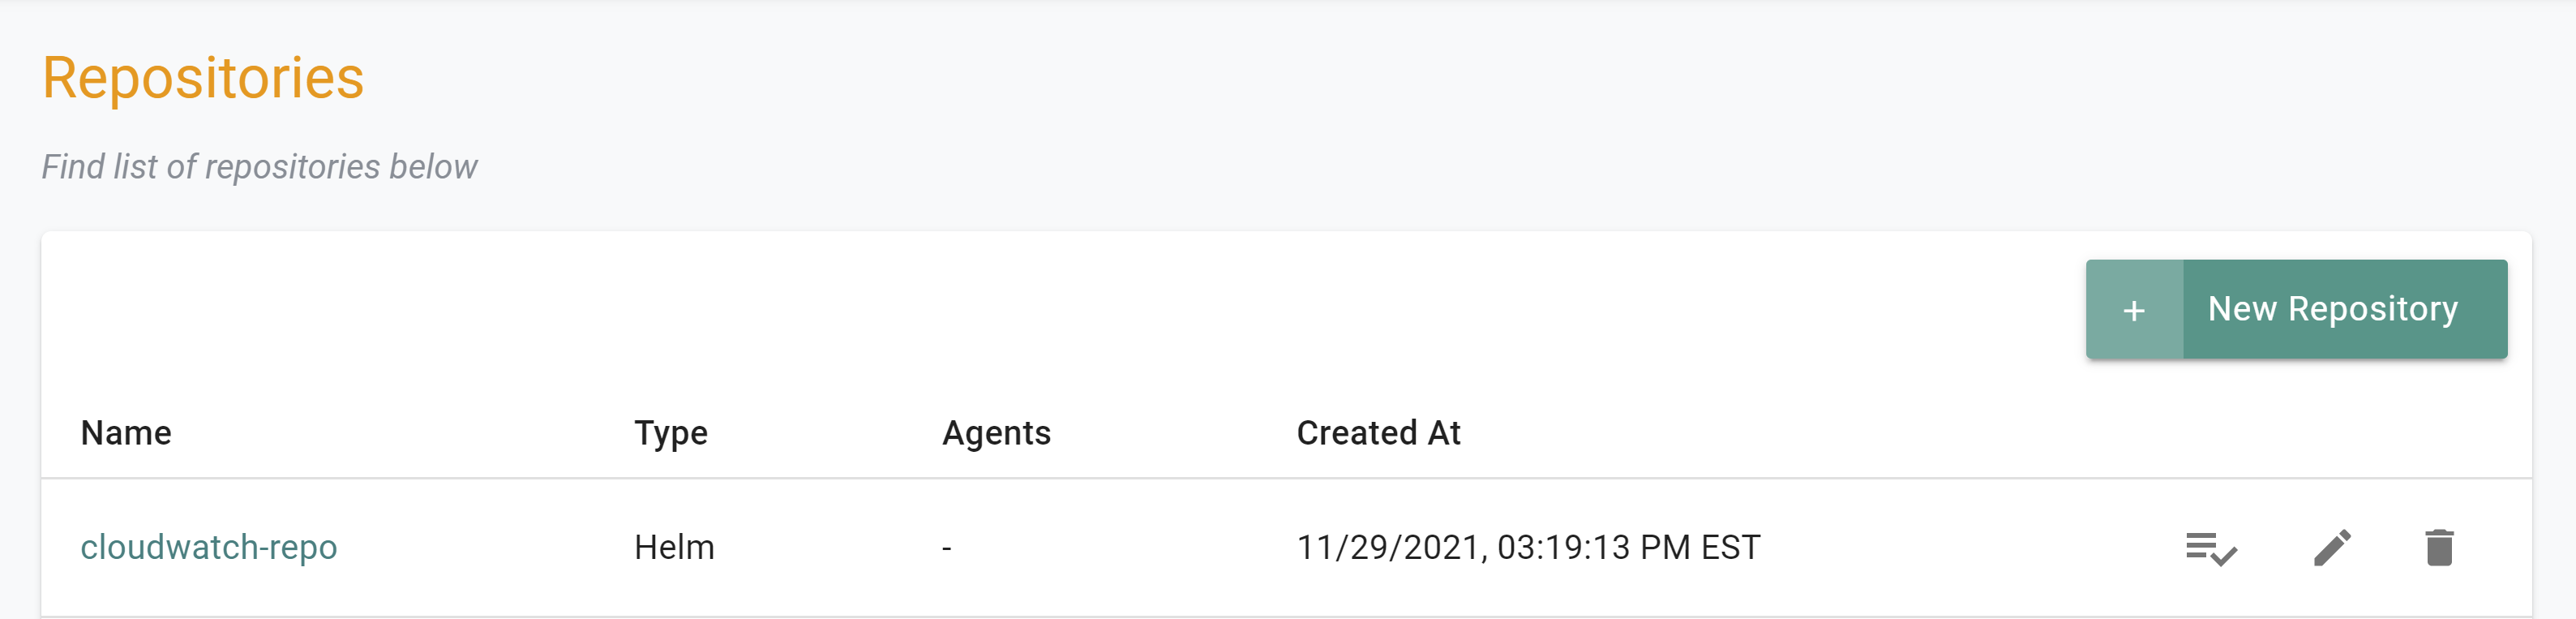
If you did not encounter any errors, you can optionally verify if everything was created correctly on the controller.
Navigate to your aws-workshop project
Select Integrations -> Repositories
Step 2: Create Addon
In this step, you will create a custom addon for the Cloudwatch Agent. Navigate to the folder /aws-workshops/kop-workshop/addon and find 2 files:
cloudwatch-addon.yaml file contains the declarative specification for the addon
custom-values.yaml file is used as an override
Let’s open both and inspect. The following details are used to build the declarative specification:
v1 because this is our first version
Name of addon is cloudwatch-addon
The addon will be deployed to a namespace called amazon-cloudwatch
The aws-cloudwatch-metrics chart will be used from the previously created repository named cloudwatch-repo
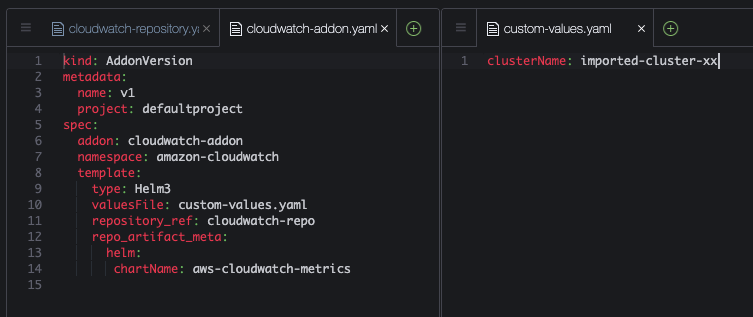
Let’s update files with our configuration:
Update the following section of the specification file with details to match your environment. Replace the xx with the number of your project.
- project: aws-workshop-xxUpdate the custom-values.yaml file with the name of your imported cluster
- clusterName: imported-cluster-xxType the command below to create the addon
rctl create addon version -f cloudwatch-addon.yaml
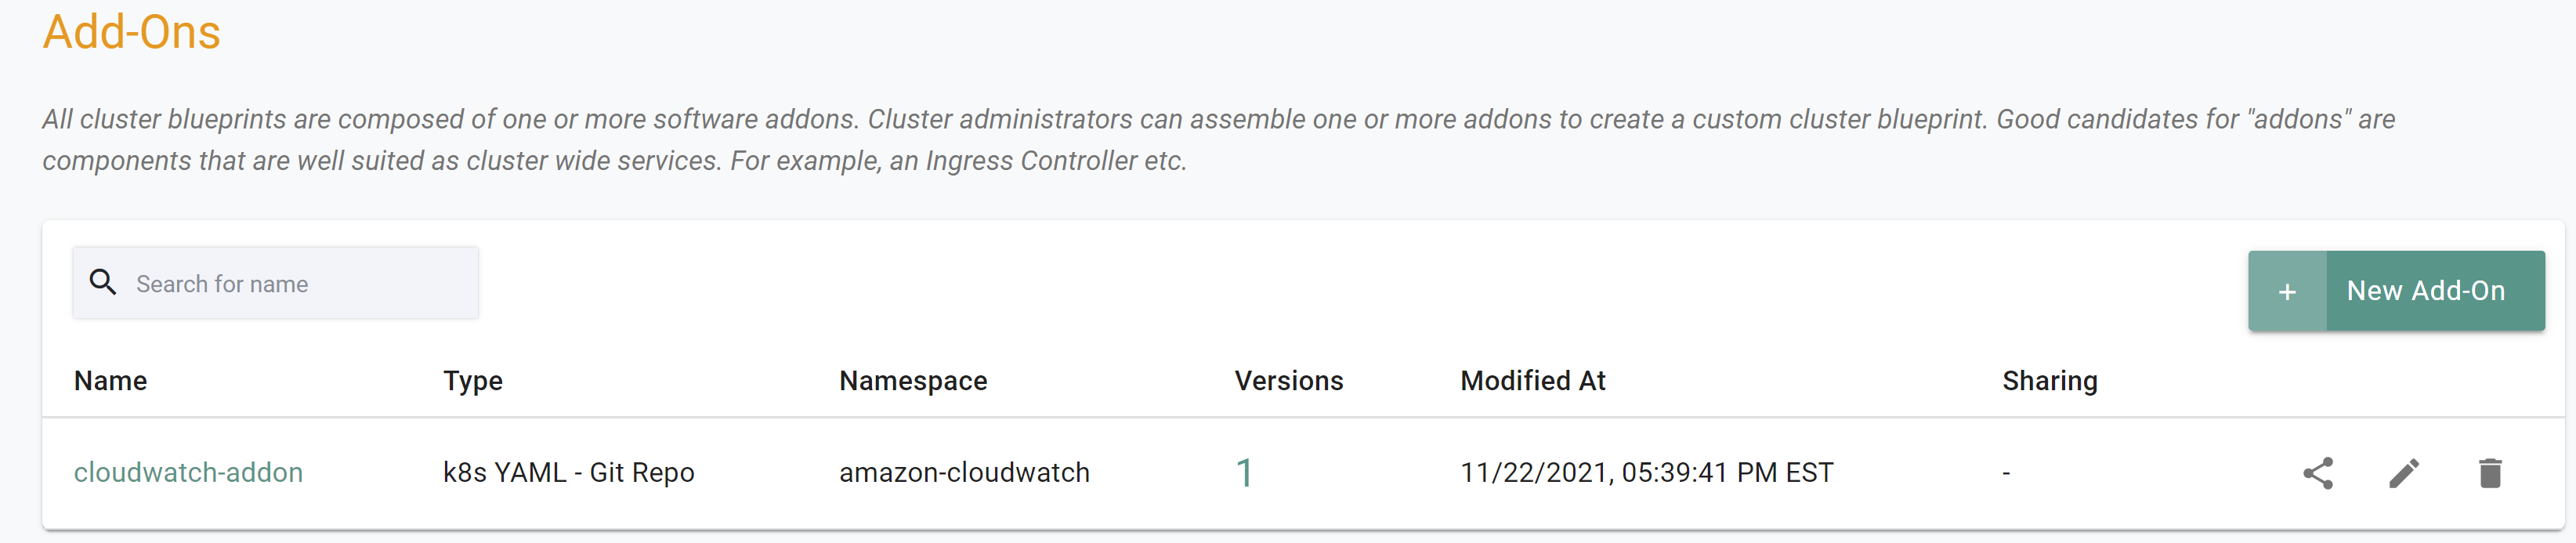
If you did not encounter any errors, you can optionally verify if everything was created correctly on the controller.
Navigate to Rafay dashboard and your project
Select Infrastructure -> Addons
You should see an addon called cloudwatch-addon
Step 3: Create Blueprint
In this step, you will create a custom cluster blueprint with the CloudWatch addon. Navigate to /aws-workshops/kop-workshop/blueprint folder. The cloudwatch-blueprint.yaml file contains the declarative specification for the blueprint.
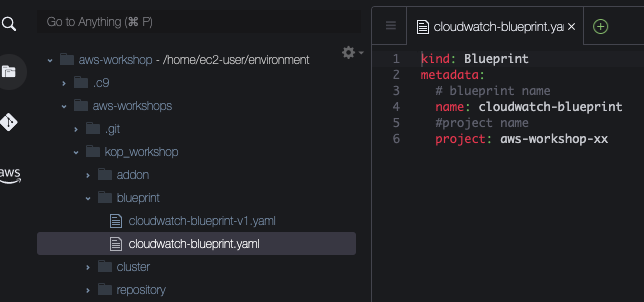
Update the following section with details to match your environment. Replace the xx with the number of your project.
- project: aws-workshop-xxType the command below to create the blueprint
rctl create blueprint -f cloudwatch-blueprint.yaml
If you did not encounter any errors, you can optionally verify if everything was created correctly on the controller.
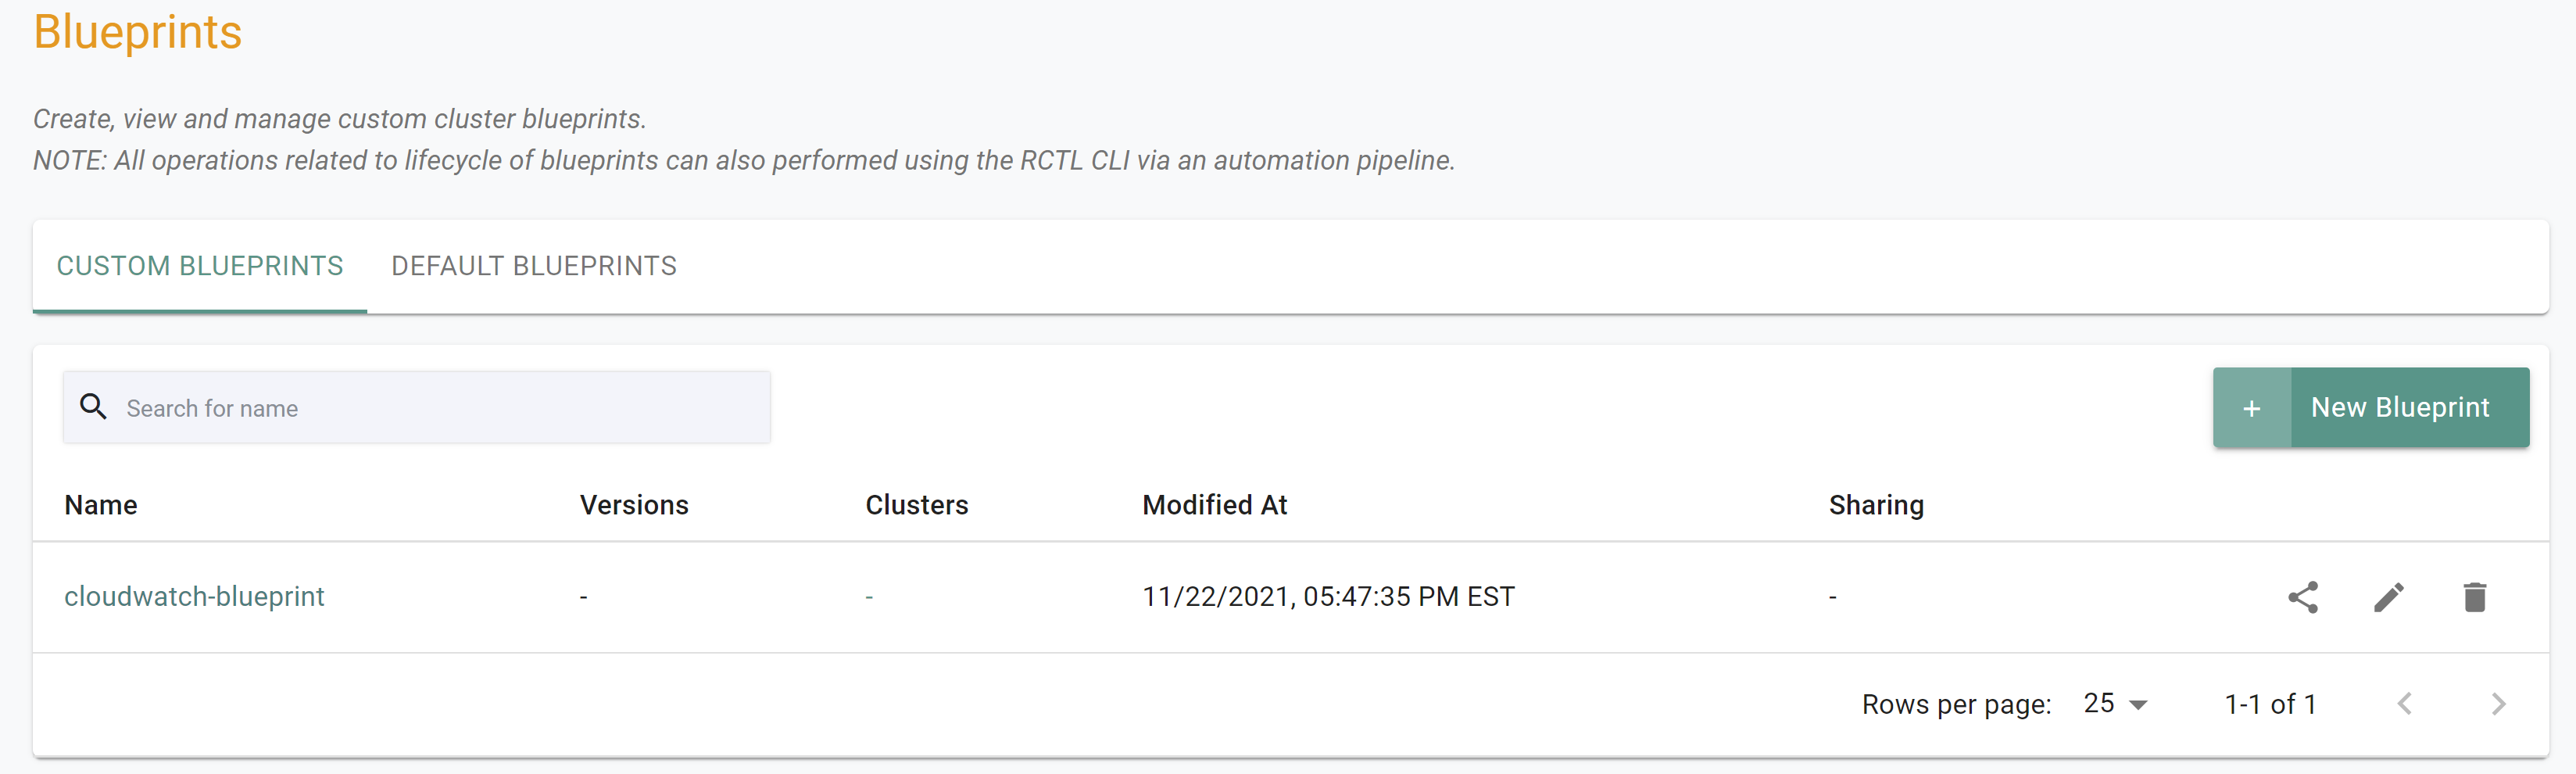
Go to your “aws-workshop-xx” project and select Infrastructure -> Blueprint
You should see the blueprint called “cloudwatch-blueprint
Blueprint Version
Although we have a custom blueprint, we have not provided any details on what it comprises. In this step, you will create and add a new version to the custom blueprint. The YAML below is a declarative spec for the new version.
Open cloudwatch-blueprint-v1.yaml file and update the following section with details to match your environment. Replace the xx with the number of your project.
- project: aws-workshop-xxType the command below to create a new blueprint version
rctl create blueprint version -f cloudwatch-blueprint-v1.yaml
If you did not encounter any errors, you can optionally verify if everything was created correctly on the controller.
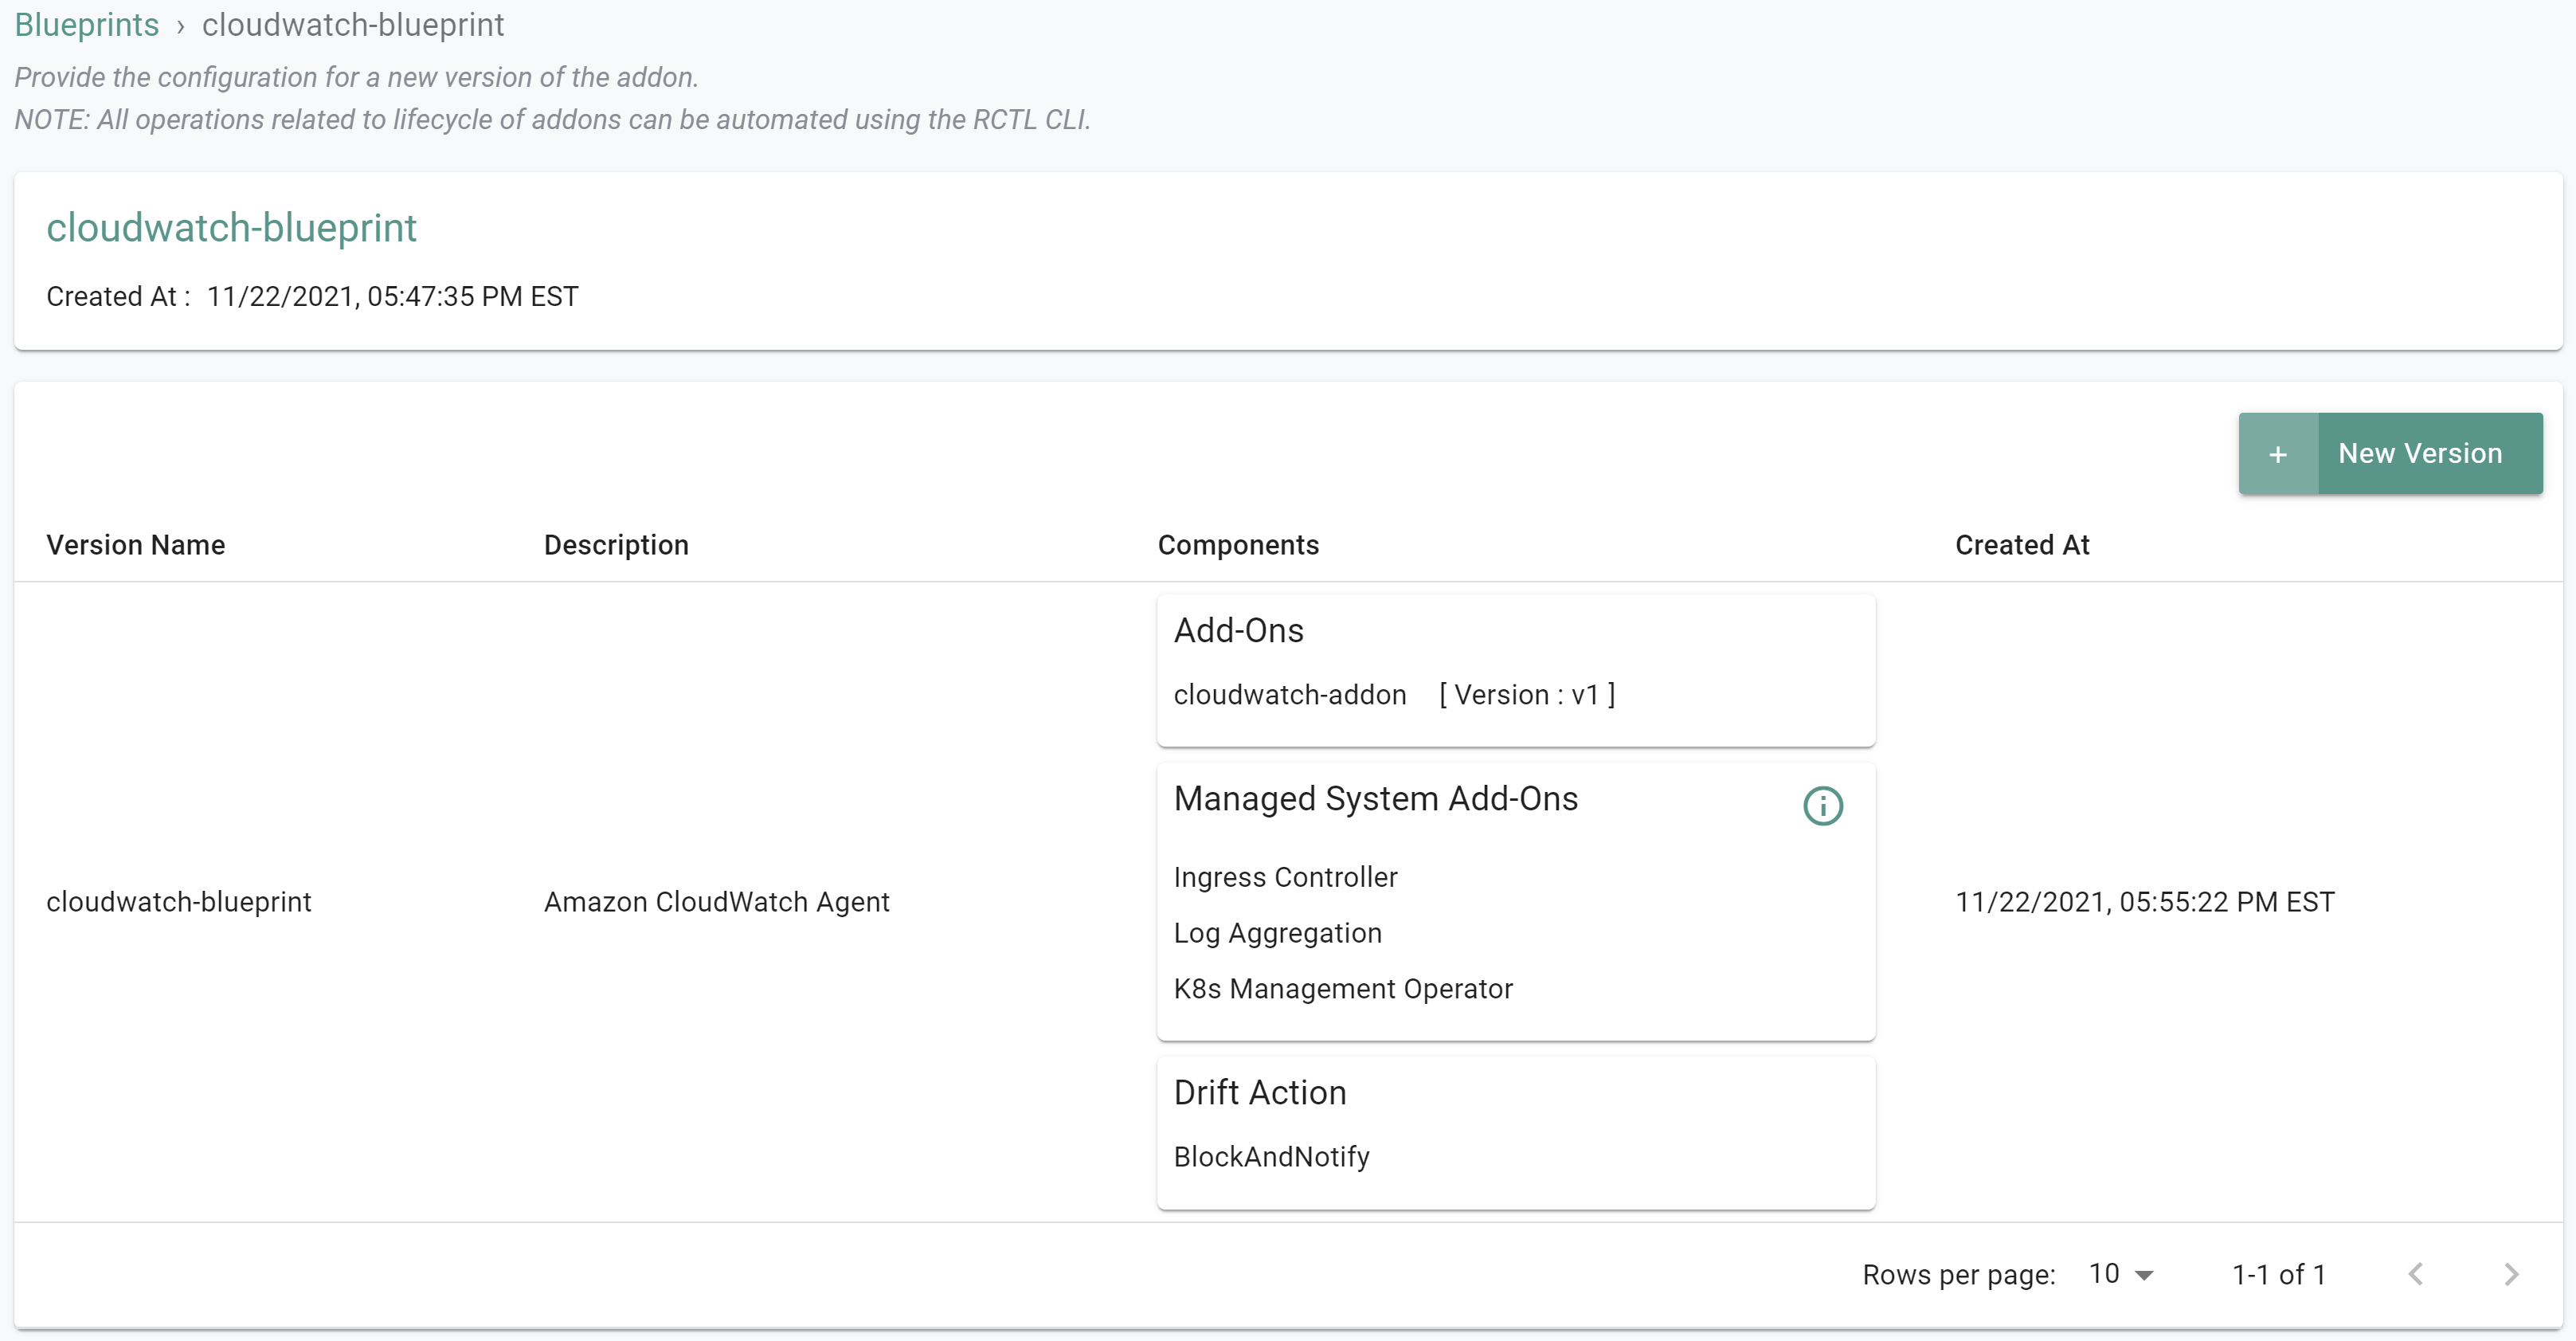
Select Infrastructure -> Blueprint in your project
Click on the cloudwatch-blueprint custom cluster blueprint
Step 4: Apply Cluster Blueprint
We will use Rafay CLI (rctl) to apply the newly created blueprint to the imported cluster.
Run the following command to update the cluster with the newly created blueprint. Replace the “xx” with the number of your project.
rctl update cluster imported-cluster-xx -b cloudwatch-blueprint --blueprint-version v1
If you did not encounter any errors, you can optionally verify if everything was created correctly on the controller.
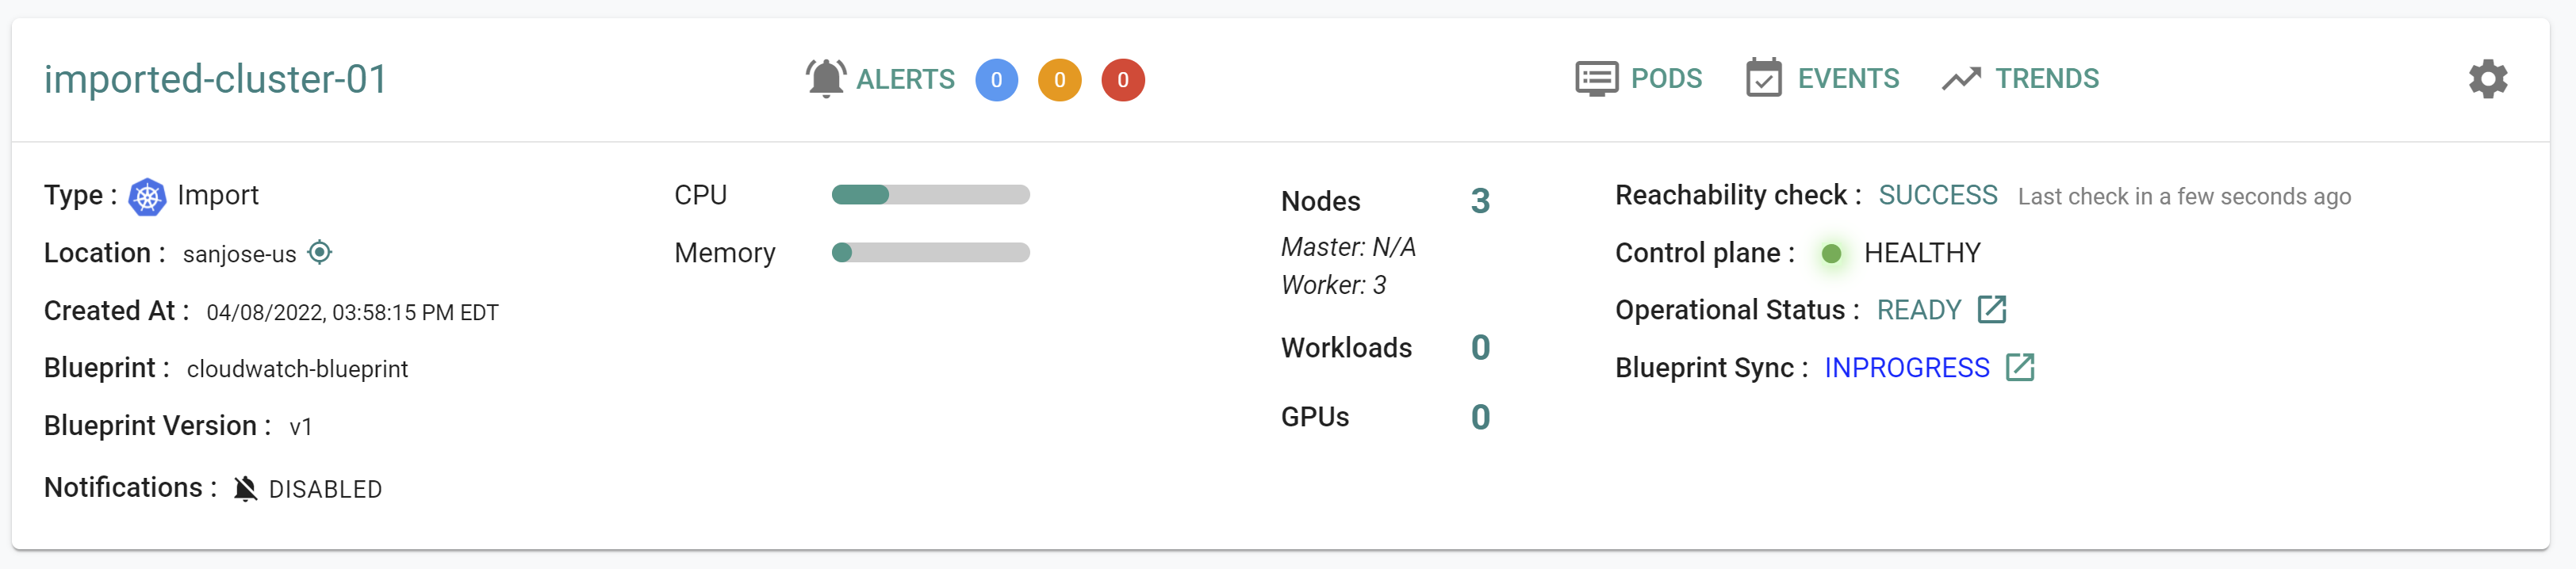
- Select Infrastructure -> Clusters in your project
- View that the updated blueprint is associated with the cluster
Recap
As of this step, you have created and applied a cluster blueprint with the CloudWatch agent as one of the addons.
Note that you can also reuse this cluster blueprint for as many clusters as you require in this project and also share the blueprint with other projects.