In this section of the workshop you will provision a new Amazon EKS cluster and import an existing Amazon EKS cluster.
Step 1: Provision Amazon EKS Cluster
In this step, you will configure and customize your Amazon EKS Cluster specification using a YAML based cluster specification.
Provisioning will take approximately 40 minutes to complete. The final step in the process is the blueprint sync for the default blueprint. This can take a few minutes to complete because this requires the download of several container images and deployment of monitoring and log aggregation components.
Open Terminal (on macOS/Linux) or Command Prompt (Windows) and navigate to the folder where you forked the Git repository
Navigate to the folder
/aws-workshops/kop-workshop/cluster The provisioned-cluster.yaml file contains the declarative specification for the cluster:
kind: Cluster
metadata:
name: provisioned-cluster-xx
project: aws-workshop-xx
spec:
blueprint: default
cloudprovider: aws-cloudcredential-xx
cniprovider: aws-cni
type: eks
---
apiVersion: rafay.io/v1alpha5
kind: ClusterConfig
metadata:
name: provisioned-cluster-xx
region: us-east-1
version: "1.20"
managedNodeGroups:
- name: ng-1
instanceType: t3.large
desiredCapacity: 2
Update the following sections of the specification file with details to match your environment. Replace the xx with the number of your project.
- name: provisioned-cluster-xx
- project: aws-workshop-xx
- cloudprovider: aws-cloudcredential-xx
- name: provisioned-cluster-xx
Save the file
Execute
rctl apply -f provisioned-cluster.yamlcommand to provision the cluster from the specification file previously defined. Expected output (with a task id):{ "taskset_id": "3mx63om", "operations": [ { "operation": "NodegroupCreation", "resource_name": "ng-1", "status": "PROVISION_TASK_STATUS_PENDING" }, { "operation": "ClusterCreation", "resource_name": "provisioned-cluster", "status": "PROVISION_TASK_STATUS_PENDING" } ], "comments": "The status of the operations can be fetched using taskset_id", "status": "PROVISION_TASKSET_STATUS_PENDING" }Execute
rctl status apply <TASK ID>to retrieve the status of the apply operation with the generated task id. Expected output:{ "taskset_id": "3mx63om", "operations": [ { "operation": "NodegroupCreation", "resource_name": "ng-1", "status": "PROVISION_TASK_STATUS_PENDING" }, { "operation": "ClusterCreation", "resource_name": "provisioned-cluster", "status": "PROVISION_TASK_STATUS_INPROGRESS" } ], "comments": "Configuration is being applied to the cluster", "status": "PROVISION_TASKSET_STATUS_INPROGRESS" }Login to the web console and view the cluster being provisioned
Once the cluster finishes provisioning, download the cluster configuration file and compare it to the specification file used to create the cluster. The two files will match.
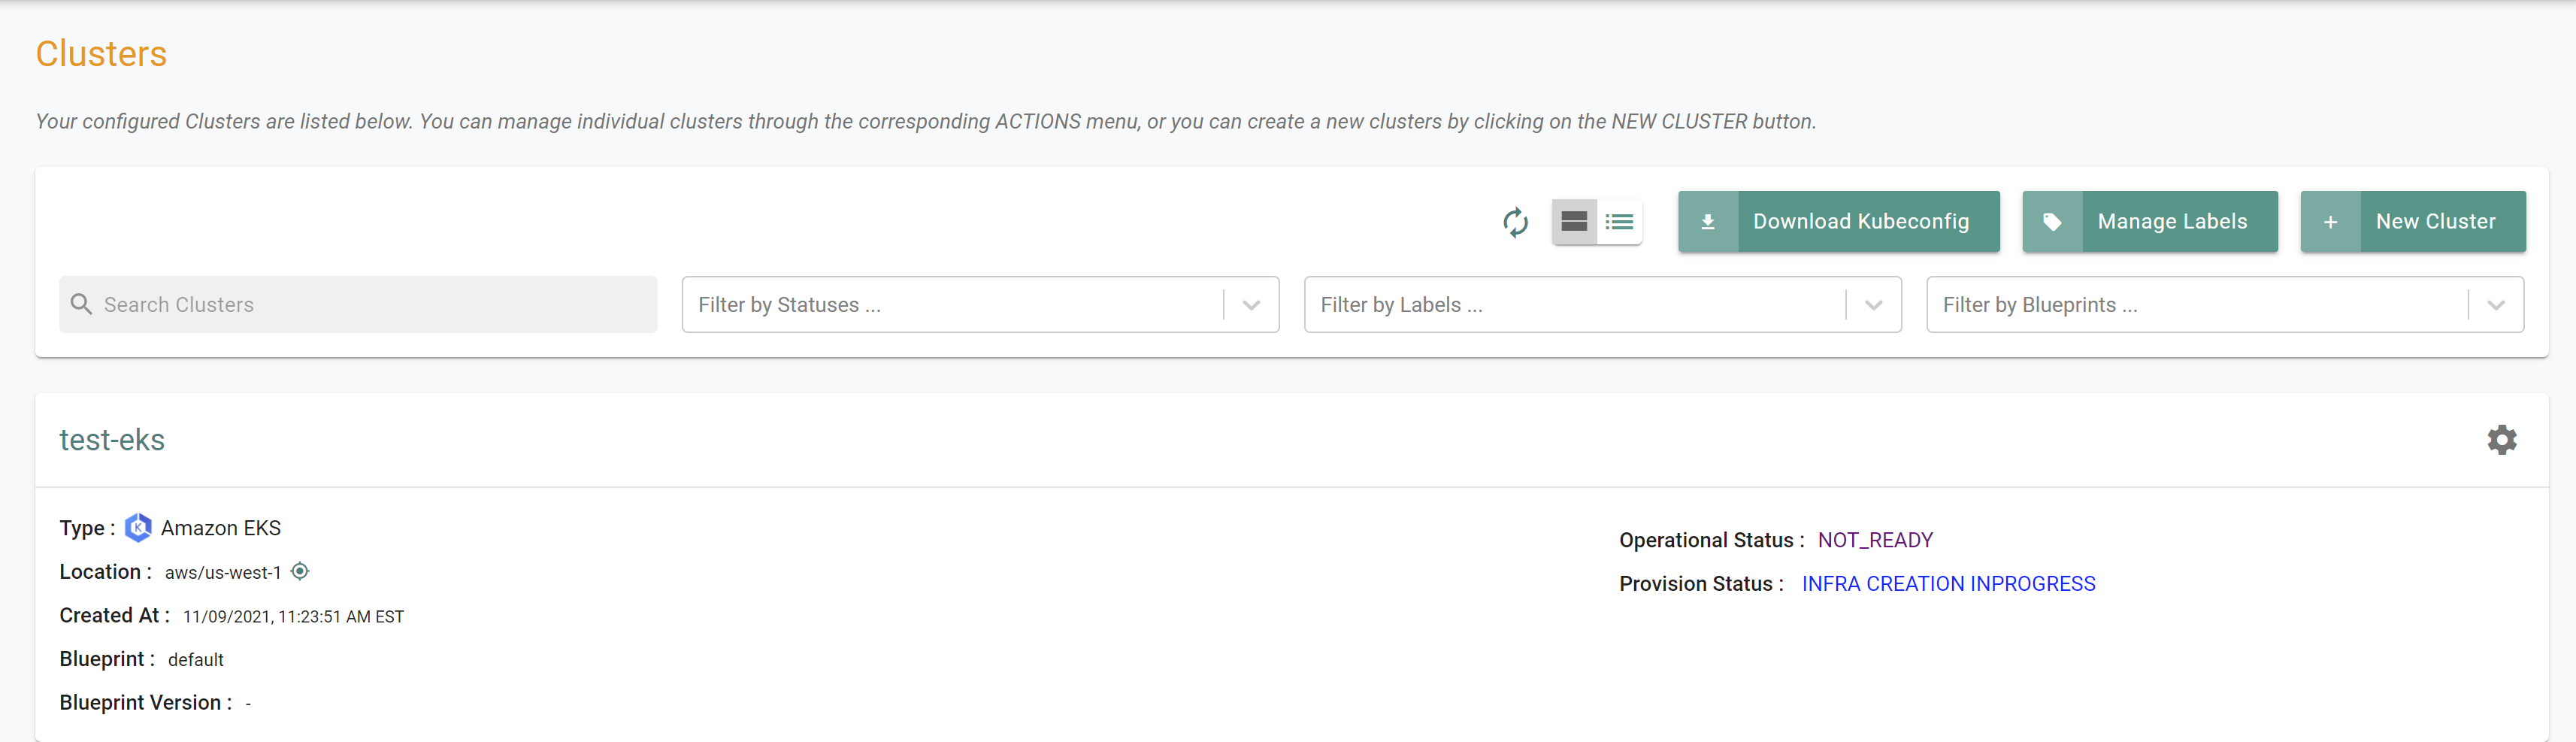
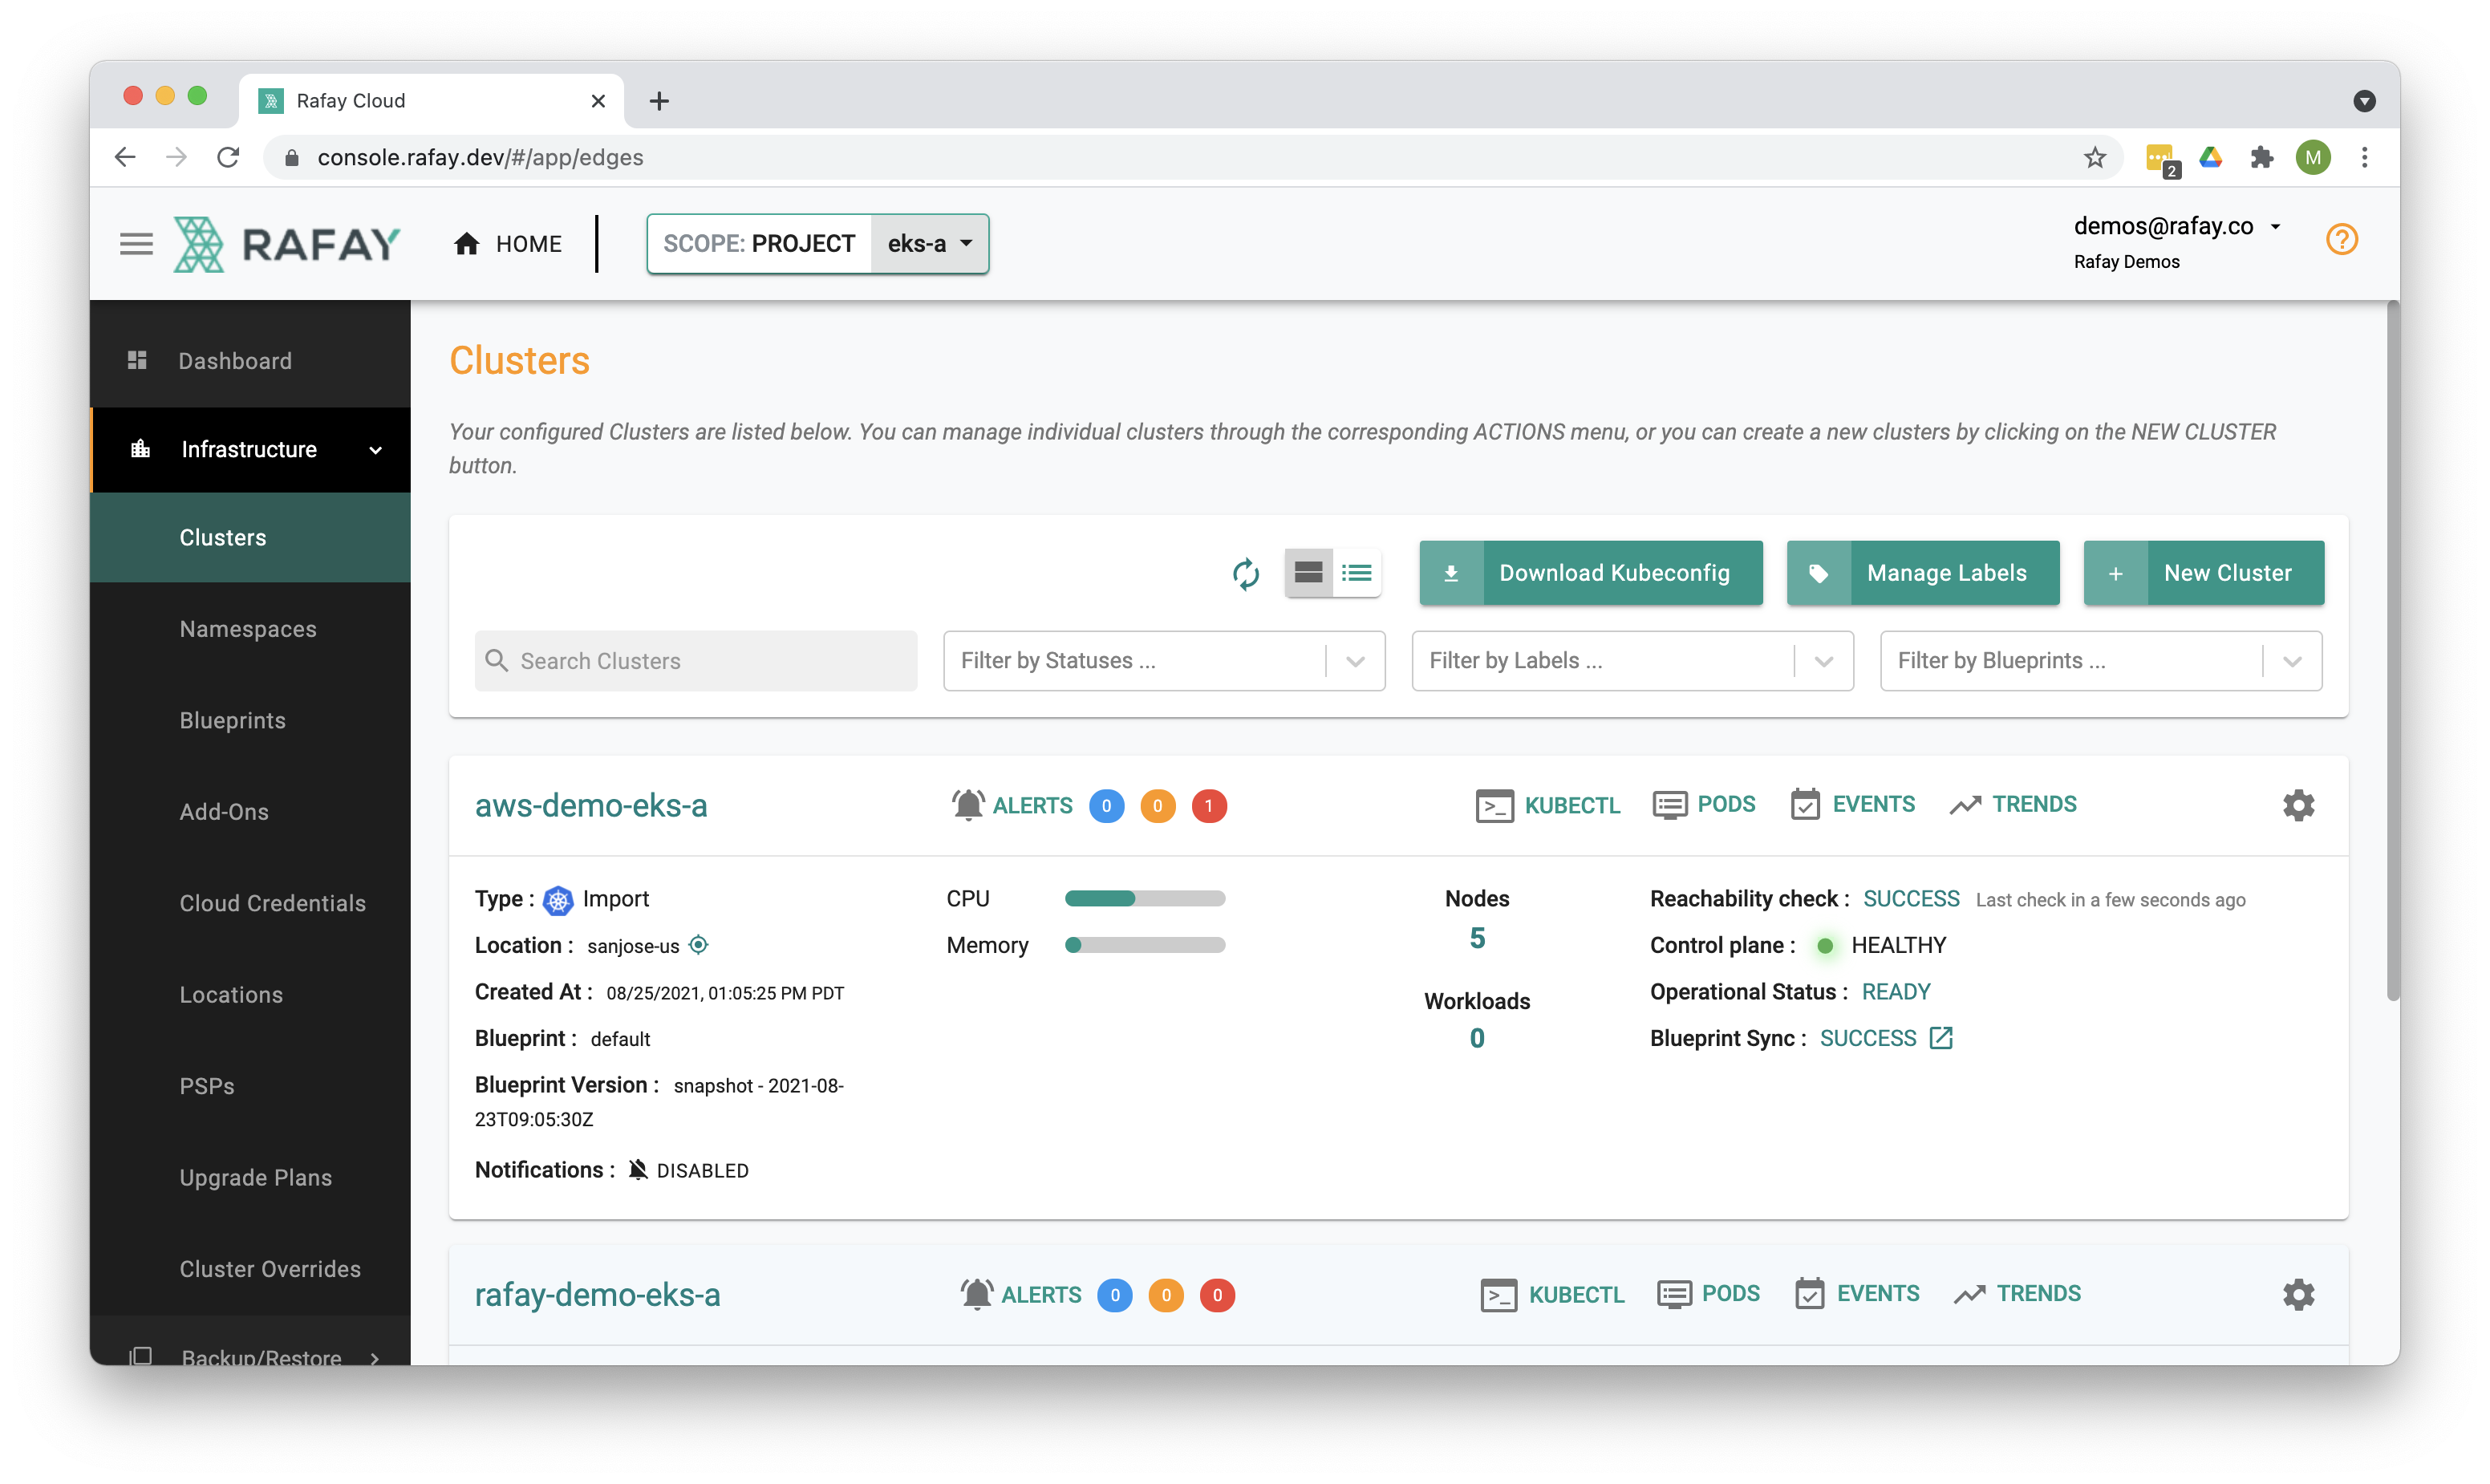
Go to Clusters -> Infrastructure
Click on the Settings icon for the newly created cluster and select Download Cluster Config
Step 2 : Import an existing Amazon EKS Cluster
In this step, you will import an existing Amazon EKS cluster
Run the following commands to import the cluster. Replace the “xx” with the number of your project.
rctl create cluster imported imported-cluster-xx > imported-cluster-bootstrap.yaml
sleep 60
kubectl apply -f imported-cluster-bootstrap.yaml
You can monitor progress/status by clicking the cluster in the Rafay console.
Once this step is complete, you should be able to view the cluster details in the console.
Recap
Congratulations! At this point, you have
- Successfully configured and provisioned an Amazon EKS cluster and imported an existing Amazon EKS Cluster.